If you follow this guide, you will be able to set up a registration site in a few minutes.
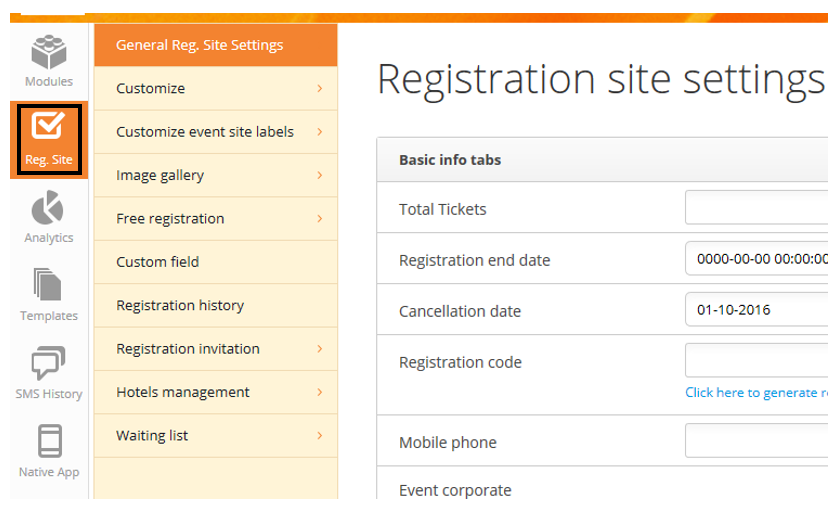
Start by clicking on Reg. Site to set up the most basic settings.
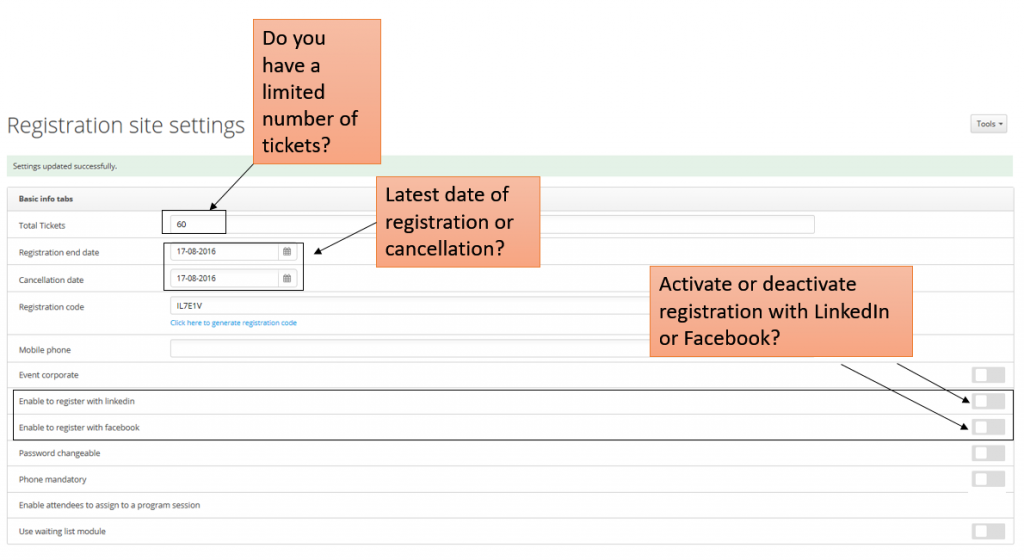

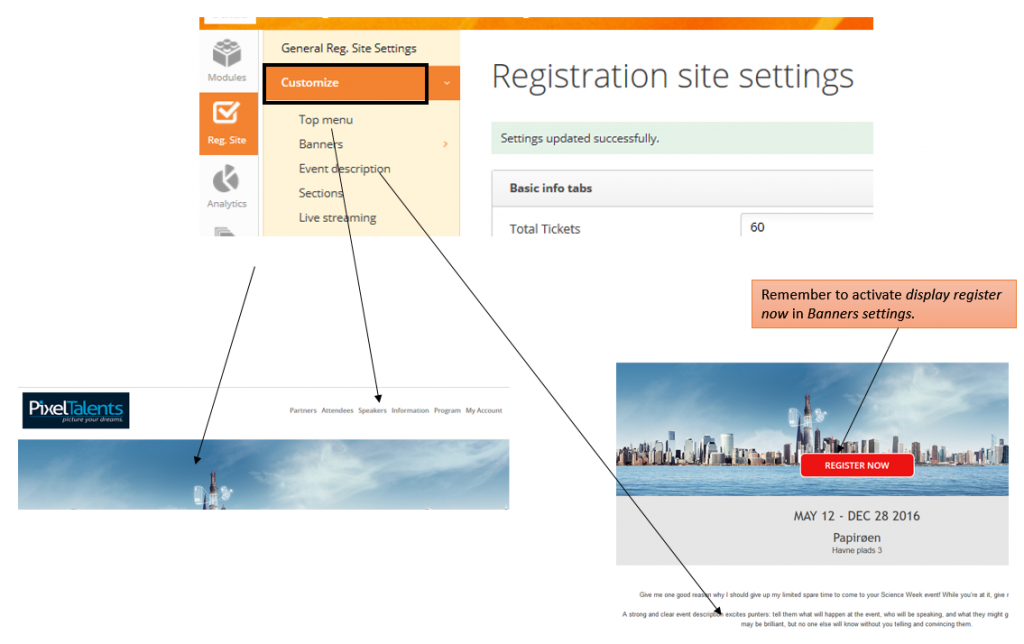
Once the basic settings are made, you can move on to customizing your registration site. You are able to show your program, Sponsors, Speakers etc. on the registration site, but if you are in a hurry and need to open up for registration as soon as possible, you can make a very basic version to start with. Remember to deactivate the modules in Top menu, if you are do not have any information to show.
You do not even have to insert a top site banner – but we strongly urge you to do so.
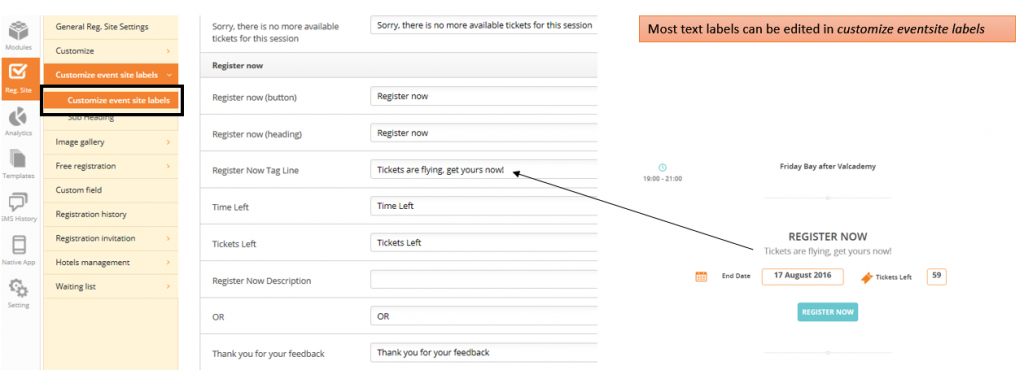
You will find various text labels on the registration site. If you wish to delete or change them, you find most of them here:
If you wish to insert a map of your venue place – a picture or a google iframe, please click here to see our guide of how to embed a map.
When you have customized your registration site, you define which personal information you need from your attendees. As a minimum, the system requires to know a first name and email address.
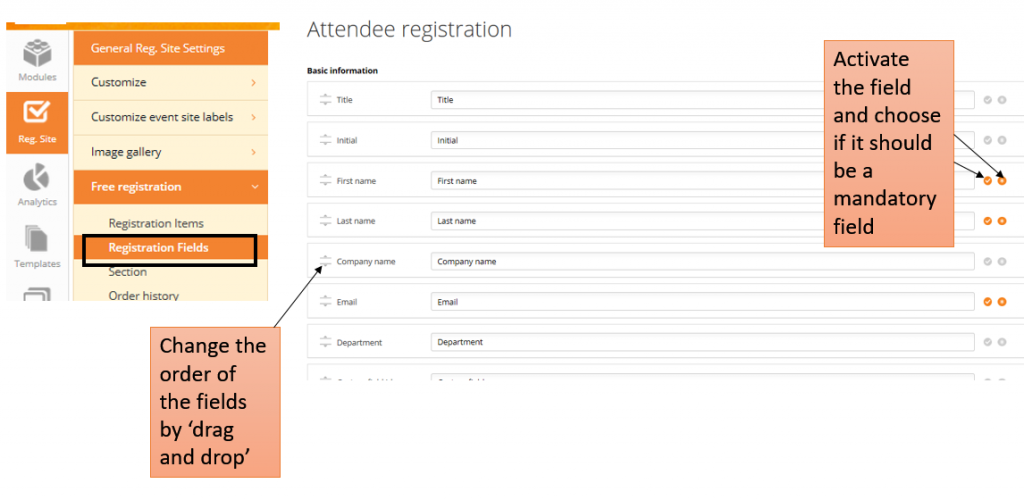
If you have any registration items you would like your attendees to choose from, the click here to see how to set them up.
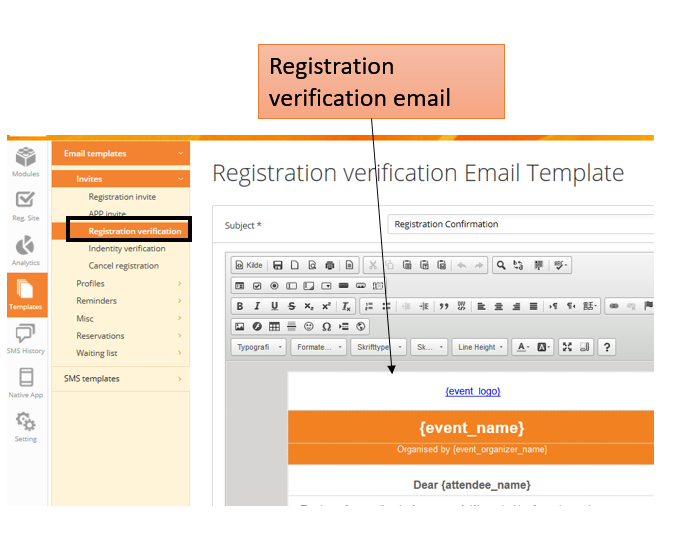
The last essential step is to customize the email template the attendees receives as a registration verification. For this particular type of registration above, it will be the below email template which are sent. All templates you find in Templates.
Now you are ready to open up for attendees to register. Copy the url from your registration site and distribute it to the people you wish to invite. You can also send out invitations to register, using the event center. Click here to find out how.
